LeanFT’s object identification center is the object spy for the LeanFT. It allows you to spy on the object and generate the code for you to copy directly into the editor. It’s one of the features which is not available with selenium.
How to open it?
You can open object identification center, by clicking in the Hat icon in visual studio or eclipse. You can also click on the LeanFT Menu within visual studio or eclipse to open the object identification center.

Main elements of object identification center
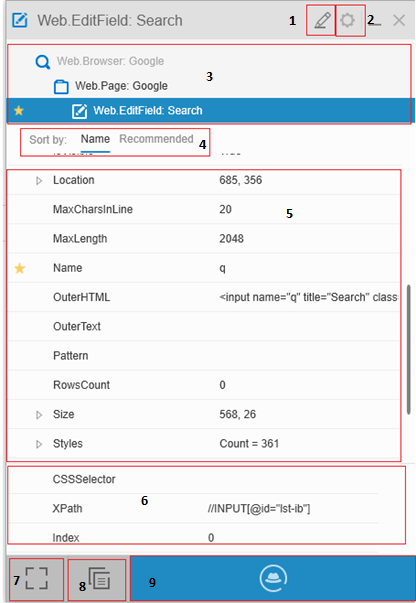
Following are the separate UI elements of the object identification center
- Switch to edit mode button: This button can be used for toggling between simple mode and Edit mode. You will read about these modes later in this article
- Settings Button: Settings button can be used to change the settings for the Object identification center
- Object hierarchy pane: This pane will display the object hierarchy of the spied objects. Recommended objects will be starred.
- Sort by: Once you select the object, you can see the properties of the object below. You can sort these properties either by name or by recommended properties.
- Object properties pane: This will show the properties of the selected object. Recommended properties will be starred.
- You can also use CSSSelector or Xpath for the identification of the objects.
- Highlight in application button: This can be used to highlight selected object in the application.
- Generate code to clipboard button: This can be used to generate the object identification code (like descriptive programming) and this code will be automatically copied to clipboard. You can toggle the language in the settings.
- Start spying button: This button is used for spying the object.
Apart from the displayed GUI items above there are 4 more items which will be visible, once you open the object identification center from the application model.
- Locate object in application model (
 ): This is used for locating the existing object in the application model.
- Add object to application model (
 ): This is used for adding objects to the application model.
- Name of the object: You can change the name of the objects here before adding it to the application model.
-
Tag: you can provide any tag name to the object.
Modes of object identification center
Simple Mode
Simple mode is for exploring the applications. It’s just like using the object spy in UFT. You can see the properties of the object and you can check which the recommended properties for the object.
Steps for using simple mode
Open Object identification center and hover the mouse over the Edit mode button, you should see a tool tip “Switch to edit mode” ( 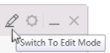 ), otherwise click on the button to switch to simple mode.
- Click on the spy button and then click on the desired object.
- You should see the object hierarchy and the properties.
Edit Mode
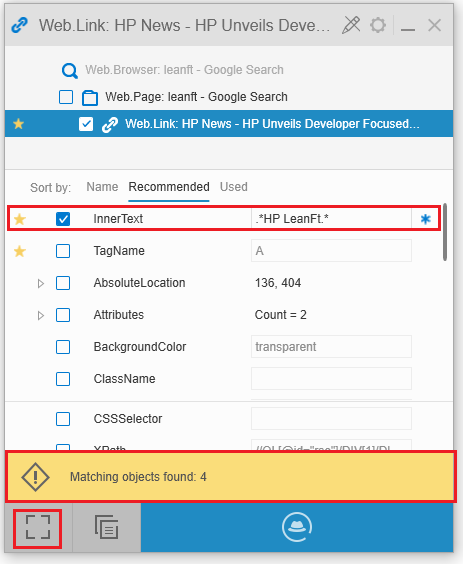
Edit mode is where we will refine/filter the properties which we will use for the object identification. We can also change the values and use regular expressions. We can then highlight the objects again to make sure that we are able to identify the objects with the selected properties.
Steps for using Edit mode
- Open the object identification center and click on switch to edit mode button.
- Click on the spy button and then click on the desired object.
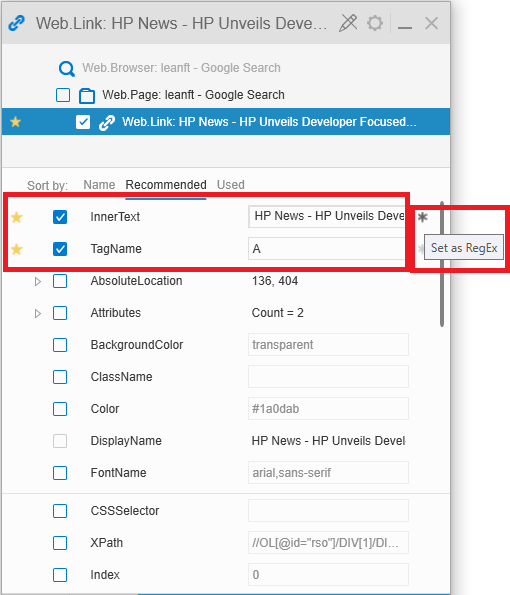
- You will see the checkboxes now in front of each of the identification properties.
- Mark the checkboxes for the properties you want to use.
- Now you can modify the property values for any of the checked properties. You can also enter the regular expressions there.
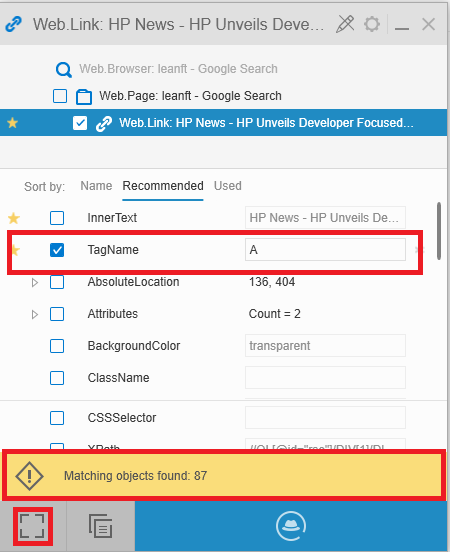
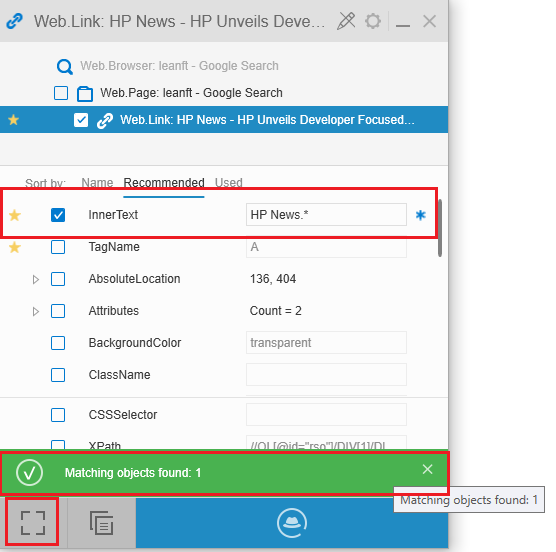
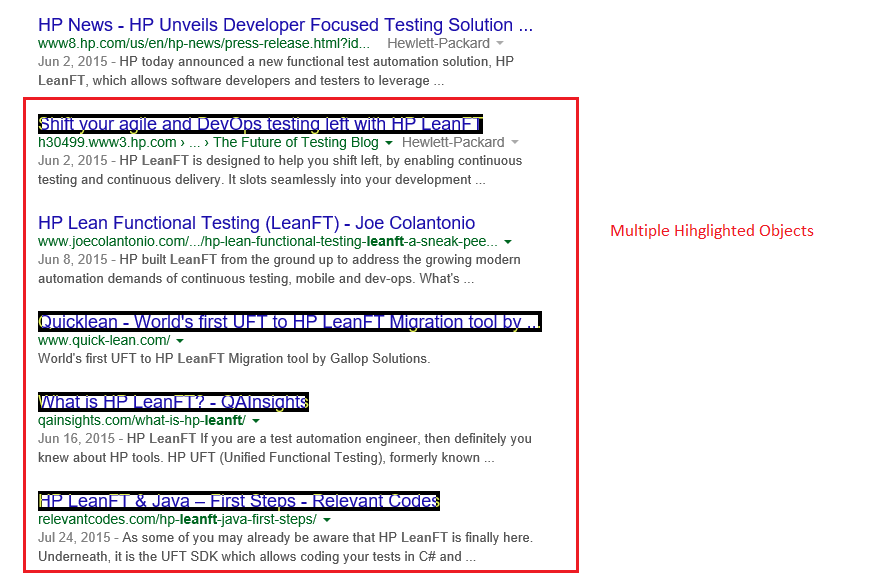
- Highlight the object again, using the highlight button (
 ) to make sure the object description is unique and you are able to highlight the object in the application. If less than 20 objects matches the properties, the Object identification center will highlight all of the objects. If more than 20 objects matches the properties than object identification center throws error message with the count of matched objects
Working with objects
Like UFT, there are two ways to handle objects in LeanFT, First you can use the programmatic descriptions for the objects, which is same as using the descriptive properties and second is using the Application Model, which is similar to having the Objects stored in the object repositories. Let’s see that in detail.
Working with programmatic descriptions
Programmatic descriptions are the way to define the objects directly inside the code. Programmatic description can be generated directly by using the object identification center. Follow the below steps for generating the programmatic description for any objects.
You can use “generate code to clipboard” button ( ) within simple or edit mode, it depends on what you want to choose, if you are ok with the properties LeanFT suggests to be used for an object, then use the simple mode, or if you want to edit the properties for the object, then you can use the Edit mode.
For Simple Mode
- Follow the steps for the simple mode object identification.
- Click on the Generate code to clipboard button. Recommended object properties and values will be copied to the clipboard.
- In Visual studio or eclipse, paste the code.
Code generated in simple mode
browser.Describe<ILink>(new LinkDescription
{
TagName = @"A",
InnerText = @"HP News - HP Unveils Developer Focused Testing Solution ..."
});
For Edit Mode
- Follow the steps from the Edit mode and make sure that you have a unique object description.
- Click on the “Generate code to clipboard” button at the bottom of the object identification center.
- In Visual studio or eclipse, paste the code.
Code generated in Edit Mode with regular expressions
browser.Describe<ILink>(new LinkDescription
{
TagName = @"A",
InnerText = As.RegExp(@".*HP LeanFt.*")
});
Note: code generated by the object identification center will have browser object as “browser”. Replace it with the name of the object you declared.
Code generated will be different for visual studio and Java. You can set this within the settings of the object identification center.
Working with Application Models (Visuals studio only)
Application models are the object repositories for LeanFT. As there can be many application models, you will have to open the desired application model in which you want to add or find the objects, and then open the object identification center from that application model.
Locate in application Model ( ) and Add to Application (
 ) Model buttons will only enable when you open the object identification center from the application model.
In Simple Mode
If you add the objects in the simple mode starred hierarchy (recommended objects) will be added to Application model. Important point to be remembered is that, by default Page object will not be added to the application model. You can change it in the object identification center settings.
In Edit Mode
If you add the object in the edit mode then the selected hierarchy of the objects will be added to the application model.
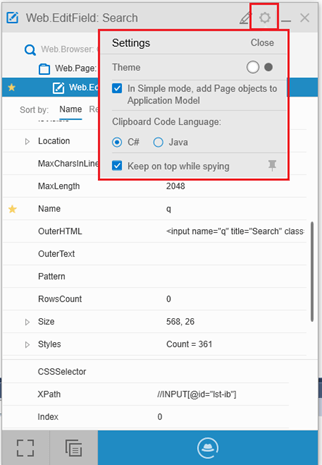
Object identification center settings
Click on the setting( ) button in the object identification center and you can change the following
- Theme for the object identification center.
- Setting for adding the page object in the simple mode.
- Clipboard code language.
- Keep on top while spying.
Let me know, if you need any other details.


Pingback: Creating LeanFT C# NUnit test | Automation Insights·
if leanft object spy is unable to identify an checkbox , how can we do it as it is a experienced case
could you help me out ?
LikeLike
If leanft is unable to find the checkboxes, then try with CSS or xpath.. using CSS works most of the time.
LikeLike
Hi,
I am unable to add the browser when I spy using the object repository but I am able to add the page due to which I am unable to execute the script. Any reasons why I am not able to add the browser to the repo. I am using IE-11 browser.
LikeLike
with LeanFT Object Spy, unable to identify few WPF objects. Object spy is freezing and need to restart the leanFT engine and object spy. Please let me know how to resolve this
LikeLike